Extracting Canadian Nutrition Data

Building on my work in the last post, I am continuing my mission to build a reliable database for retreiving nutrition information for commonly used ingredients. I will use this data in order to add a calculator to estimate nutrition facts for recipes in my recipe management app Root Cellar (Github).

The ComprehensiveFoodDatabase I cleaned up in the last post is derived from the USDA FoodData dataset. While it has a huge variety of branded foods, and a decent number of raw ingredients (albeit with odd names and unintuitive units) I was having a lot of trouble getting good matches for even the common ingredients in my recipes.

I really needed a data source for common raw ingredients used in cooking. I came across the Canadian Nutrient File dataset, so I decided to give that a try next.

Exploring the Canadian Nutrient Files

I started by downloading the files as CSV, and then used DB Browser for SQLite to import the CSV files into snake_case named tables. You can find the resulting SQLite DB here.

 CREATE VIEW canfood AS
SELECT 
	FoodID, description, serving_size,
	avg(NutrientValue) filter(where NutrientName = "ENERGY (KILOCALORIES)") calories,
	avg(NutrientValue) filter(where NutrientName = "FAT (TOTAL LIPIDS)") fat,
	avg(NutrientValue) filter(where NutrientName = "CARBOHYDRATE, TOTAL (BY DIFFERENCE)") carbs,
	avg(NutrientValue) filter(where NutrientName = "PROTEIN") protein,
	avg(NutrientValue) filter(where NutrientName = "FIBRE, TOTAL DIETARY") fiber,
	avg(NutrientValue) filter(where NutrientName = "SUGARS, TOTAL") sugar,
	avg(NutrientValue) filter(where NutrientName = "SODIUM") sodium
FROM
	(SELECT
		food_name.FoodID, food_name.FoodDescription as description, serving_size, 
		nutrient_amount.NutrientName, nutrient_amount.NutrientValue
	FROM (
		SELECT * FROM food_name LEFT JOIN (
			SELECT conversion_factor.FoodID, measure_name.MeasureDescription as serving_size FROM conversion_factor LEFT JOIN measure_name ON conversion_factor.MeasureID = measure_name.MeasureID
		) as serving ON food_name.FoodID = serving.FoodID
	) as food_name
	INNER JOIN (
		SELECT nutrient_amount.FoodID, nutrient_amount.NutrientValue, nutrient_name.NutrientName FROM nutrient_amount INNER JOIN nutrient_name ON nutrient_amount.NutrientID = nutrient_name.NutrientID
	) as nutrient_amount 
	ON food_name.FoodID = nutrient_amount.FoodID) as nutr
GROUP BY FoodID
Canada Nutrient File DB structure.

I acheive my final, clean table called canfood with a series of joins:
1) Food Name <= Nutrient Amount <= Nutrient Name
2) Joined table from step 1 <= Conversion Factor <= Measure name (Serving size)
Then by grouping on food ID, I was able to aggregate the various macronutrient types into their own columns (Note: I only aggregate for a limited number of nutrition values, but many more are available in the database, including for many micronutrients).

This data is great!

Once the data was all assembled in the canfood table, I found that the nutrtion data contained here was a lot more comprehensive for raw ingredients as compared to the dataset from the USDA I explored in my last post. It’s much more suitable for my needs in my recipe manager project.

It was definitely worth the time to migrate the data over! After some more SQL magic, I incorporated the canfood table data into the food_search table in the database I generated in my last post to finalize my comprehensive nutrition dataset. I’ve renamed some of the fields and eliminated some superfluous columns to yield a clean final product. You can access the final full-text search nutrition SQLite DB here.

CREATE VIRTUAL TABLE food_search USING fts5(
    fdc_id,
    description, brand_name, brand_owner,
    serving_size, serving_size_unit,
    calories, protein, carbs, fat, fiber, sodium, sugar
);

INSERT INTO food_search (
    fdc_id, 
    description, brand_name, brand_owner,
    serving_size, serving_size_unit,
    calories, protein, carbs, fat, fiber, sodium, sugar
) SELECT
    fdc_id, 
    description, brand_name, brand_owner,
    serving_size, serving_size_unit,
    energy_amount as calories, protein_amount as protein, carb_amount as carbs, fat_amount as fat, fiber_amount as fiber, sodiumna_amount as sodium, sugarstotalincludingnlea_amount as sugar
FROM usda_branded_column;

INSERT INTO food_search (
    fdc_id, 
    description,
    serving_size, serving_size_unit,
    calories, protein, carbs, fat, fiber
) SELECT
    fdc_id, 
    description,
    serving_amount as serving_size, serving_text as serving_size_unit,
    energy_amount as calories, protein_amount as protein, carb_amount as carbs, fat_amount as fat, fiber_amount as fiber
FROM usda_non_branded_column;

INSERT INTO food_search (
    fdc_id, 
    description,
    serving_size_unit,
    calories, protein, carbs, fat, fiber, sodium, sugar
) SELECT
    FoodID as fdc_id, 
    description,
    serving_size as serving_size_unit,
    calories, protein, carbs, fat, fiber, sodium, sugar
FROM canfood;

Building a Nutrition Calculator

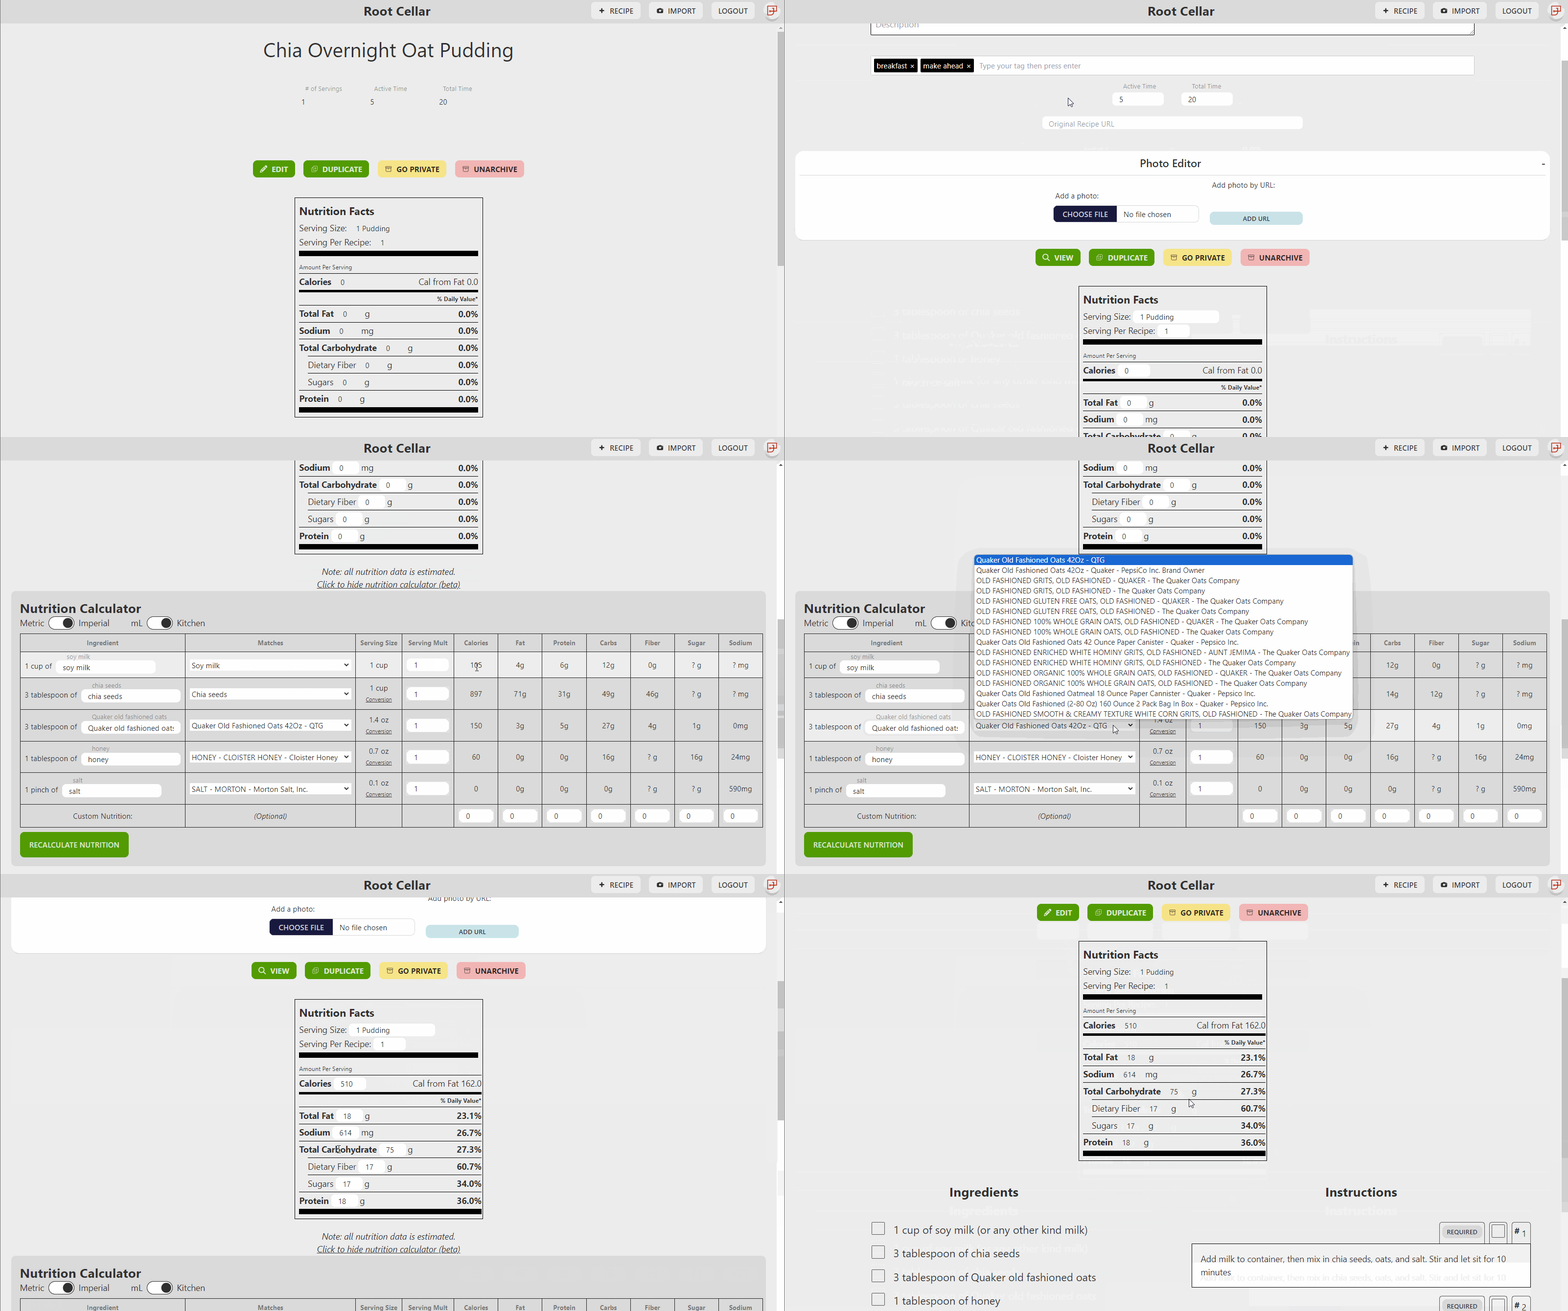
I’m excited to report that using this data, I’ve got a functional nutrition calculator up and running on Root Cellar (Github). I’m now having much more success matching ingredients in my recipe app as I have much better coverage of raw ingredients using this database. I have not included the menustat table in my searchable database, as I do not need data on fast-food nutrition but the process is the same as shown above if you wish to incorporate it for your own uses.

Beta Root Cellar Nutrition Calculator

I hope this information/database can help somebody. Thanks again to the USDA, Health Canada, and ComprehensiveFoodDatabase teams for their work on this dataset.

References:
– Whalen, Lexington, Brie Turner-McGrievy, Matthew McGrievy, Andrew Hester, and Homayoun Valafar. “On Creating a Comprehensive Food Database.” In 2022 International Conference on Computational Science and Computational Intelligence (CSCI), pp. 1610-1614. IEEE, 2022.
– U.S. Department of Agriculture, Agricultural Research Service. FoodData Central, 2019. fdc.nal.usda.gov.
Canadian Nutrient File, Health Canada, 2015

Extracting Nutrition Data

There’s a relative paucity of good nutrition data sources on the web that are open-source. I’m developing a recipe management system called Root Cellar (Github), and I’m interested in calculating out an estimate of the nutritional content of each ingredient in a recipe. To do so I needed a data source that I could access easily (ideally without calling an API) from a Sveltekit application.

Data Loading Blues

The ComprehensiveFoodDatabase seemed a promising data source. I tried downloading, but was quickly met with errors as Github notified me the Git Large File Storage quota had been exceeded and I would not be allowed to clone the datbase from the repo. I finally found a workaround by forking then archiving a copy of the repo. If you want access to the original dataset you should be able to download it by downloading as a zip from: https://github.com/jpoles1/ComprehensiveFoodDatabase

Next, I wanted to access the data using sqlite3. Unfortunately, I got a bunch of errors when trying to load in the .sql file. I eventually learned this was because the file was compatible with MySQL, but included syntax unsuitable for SQLite. To fix this, I tried a number of scripts and other conversion solutions found on stackoverflow and Github, but all either froze (given the large file size of 7+ GB) or failed.

Eventually I just spun up a MySQL database using Docker and after a couple hours of (very slow) SQL importing, the database was ready. The provided database has the data in both row and column formats. While row format may be useful for some circumstances, it results in a significant duplication of data (columns like description and brand name) inflating file sizes significantly.

MySQL Success => Export

Once imported into MySQL I was able to dump all the tables to csv (to make it easier for others to use for other assorted projects (file sizes aren’t too shabby either). You can download both the sqlite and csv files here. If you want to run SQL queries without any other overhead, I recommend using DB Browser for SQLite to load and explore the data.

I have included 2 sqlite files:

– CompFood.sqlite = 3 tables (menustat, usda_branded_column, usda_non_branded_column)
– CompFoodSearch.sqlite = Above with an added full-text search table (food_search) using FTS5.

Full Text Search

Next, I needed full-text search in order to locate each ingredient from my recipe in the database. SQLite may seem simple at first, but under the hood are a ton of powerful features. Using the FTS5 extension, I am able to easily enable fulltext search across my table. To get started, I generated the food_search table using the following SQL code:

CREATE VIRTUAL TABLE food_search USING fts5(
    fdc_id,
    description, brand_name, brand_owner,
    serving_size, serving_size_unit,
    protein_unit, carb_unit, fat_unit, energy_unit, fiber_unit, sodiumna_unit, sugarstotal_unit,
    protein_amount, carb_amount, fat_amount, energy_amount, fiber_amount, sodiumna_amount, sugarstotal_amount
);

INSERT INTO food_search (
    fdc_id, 
    description, brand_name, brand_owner,
    serving_size, serving_size_unit,
    protein_unit, carb_unit, fat_unit, energy_unit, fiber_unit, sodiumna_unit, sugarstotal_unit,
    protein_amount, carb_amount, fat_amount, energy_amount, fiber_amount, sodiumna_amount, sugarstotal_amount
) SELECT
    fdc_id, 
    description, brand_name, brand_owner,
    serving_size, serving_size_unit,
    protein_unit, carb_unit, fat_unit, energy_unit, fiber_unit, sodiumna_unit, sugarstotalincludingnlea_unit as sugarstotal_unit,
    protein_amount, carb_amount, fat_amount, energy_amount, fiber_amount, sodiumna_amount, sugarstotalincludingnlea_amount as sugarstotal_amount
FROM usda_branded_column;

INSERT INTO food_search (
    fdc_id, 
    description,
    serving_size, serving_size_unit,
    protein_unit, carb_unit, fat_unit, energy_unit, fiber_unit,
    protein_amount, carb_amount, fat_amount, energy_amount, fiber_amount 
) SELECT
    fdc_id, 
    description,
    serving_amount as serving_size, serving_text as serving_size_unit,
    protein_unit, carb_unit, fat_unit, energy_unit, fiber_unit,
    protein_amount, carb_amount, fat_amount, energy_amount, fiber_amount
FROM usda_non_branded_column;

Once created, I can now search the food_search table using SQL like the following:

SELECT * FROM food_search WHERE food_search MATCH '${ingredient}' ORDER BY rank LIMIT 50

For example, I can search for foods containing the word blue cheese, sorting first on rank to get the top matches, then sorting on length to get the shortest food description (which I think is going to select for the most likely matches for my use case).

SELECT DISTINCT * FROM (
	SELECT DISTINCT * FROM food_search WHERE food_search MATCH 'blue cheese' ORDER BY rank LIMIT 50
) ORDER BY length(description) LIMIT 10

I hope this quick tutorial can help you get started with exploring this data set. A huge thank you to the ComprehensiveFoodDatabase team for their work in constructing this dataset. You can read more about the creation of this dataset here: https://arxiv.org/abs/2301.10649

Citation:
Whalen, Lexington, Brie Turner-McGrievy, Matthew McGrievy, Andrew Hester, and Homayoun Valafar. “On Creating a Comprehensive Food Database.” In 2022 International Conference on Computational Science and Computational Intelligence (CSCI), pp. 1610-1614. IEEE, 2022.

Intro To CadQuery Series: Installing CQ-Editor

In this article you’ll learn about how to install CQ-Editor, the CadQuery IDE. If you follow along, by the end of this article you’ll be all set up and taking your first steps by creating your first CadQuery model.

What is CQ-Editor?

CQ-Editor is an Integrated Development Environment (IDE) for designing in CadQuery. It is one of several solutions which help you to visualize and debug your CadQuery models, but I have chosen it to introduce CadQuery because it provides a number of key tools to help users get a kickstart creating designs, including:

– A code editor for creating your model in python
– A 3D viewport to visualize your design
– A debugger + variable viewer to help troubleshoot your design

Both CadQuery and CQ-Editor are currently under active development, so the installation process is not yet perfectly streamlined. Below I will describe my process for setting up CQ-Editor in a bit more detail than the README (which you should read, it contains a ton of essential information!). Follow along, and we’ll have you up and running in no time.

Installing CQ-Editor (The Easy Way):

For those who do not wish to install and setup a Python environment to run the CQ-Editor source code (which is a lot easier than it sounds, I promise! See below for more info…) there are precompiled releases of CQ-Editor that are as simple as download and run.

As mentioned above, CQ-Editor is still under active development at the time I am writing this article. Unfortunately, the current release of CQ-Editor on the main Github repository is very out of date and should not be used (@V0.2; article last updated: 09/2022).

Instead you should go to a fork of the core repository made by jmwright where you can download a working release of CQ-Editor. You will need a Github account. Once logged in to Github, simply navigate to the above link, click the first build entry with a green checkmark, scroll to the bottom, and download the release for your OS under the header Artifacts (see video below). Once your download is complete, unpack the archive, and run the script in the root folder. You made it! You can skip over the next few sections if you’d like, as they will be covering an alternative approach to installing CQ-Editor.

I’ve had it with all these #!@*&% snakes!
(AKA how to install CQ-Editor with conda)

So, you want to install and run CadQuery from source, welcome! I promise, it’s not as scary as it may sound. This approach will give you a lot more flexibility and freedom. You can install whatever libraries/plugins you’d like, or even edit the source code. If you’re looking to contribute to the development of CQ-Editor, this is also the approach for you!

CadQuery and CQ-Editor are written in Python, a great langauge for this kind of application, but nonetheless sometimes a bit of a beast to get setup. This becomes particularly clear when it comes to wrangling python versions and dependencies. There are many solutions that are currently available (venv, pipenv, poetry, conda) to address this problem in one way or another. CadQuery primarily uses Anaconda (conda), a cross-platform, popular, and well-supported distribution of Python with its own dependency management system built-in. For those new to Python or a bit rusty, using Conda can be a bit challenging to get right at first. For this reason I’m going to start by walking you through getting up and running with Conda. If you’ve already got Conda up and running you can probably skip this section!

Anaconda is primarily oriented to Python users who work in Data Science, and thus the full version of the Anaconda distribution comes bundled with a number of common libraries for this purpose already installed. If you do this kind of work, it’s a great perk and allows you to get up and running quickly. For someone who is installing conda primarily to install CadQuery, the full Anaconda installation comes with a lot of unecessary functionality, that will take up a bunch of your disk-space. If this applies to you, I recommend using Miniconda which includes a Python distribution, conda (for dependency management), and a few core packages to support these base features without all the excess bloat. Clicking the above link will bring you to a page where you will pick the latest installer compatible with your OS, and download!

Note: For Windows users, I recommend you Select both “Add Miniconda to my PATH” and “Register Miniconda as my default” as long as you plan to use this as your primary Python distribution on the machine. This will make things easier and more streamlined (in my opinion). If you wish to use other Python distributions alongside Miniconda, selecting this may cause conflicts, and should only be done at your own peril.

Installing CQ-Editor (Conda)

Now that you have conda running on your machine, you will need to download the CQ-Editor source code. If you’re going this route, you’ll most likely want to download the latest development version of CQ-Editor. The best way is to use git (git clone https://github.com/jmwright/CQ-editor.git), however you can also download a zip of the repository. If necessary extract the source code, and then navigate into the root folder of the project (cd ./CQ-Editor).

Now we need to install the project’s dependencies so we can run the source code. We will use conda to create a Python virtual environment (venv) in which we will store our CadQuery dependencies. This approach with a venv is prefered over installing into the global/root environment, as it allows us to download the complete set of libraries compatible with CQ-Editor without interfering with any dependencies which may be installed for other projects (for example).

Before we start installing dependencies into our venv, we have the opportunity to add in any additonal dependencies which we may need for our work in CadQuery. For new users, this may not be necessary now but it is something you may want to come back to later! There aren’t a ton of plugins available quite yet, but there are definitely some great additions to the core proejct you might want, and I expect the number will continue to grow along with the growing community of users! There are a few places to look for plugins, including the “Awesome Cadquery” page, and the official list of plugins. A special shoutout to the plugin cq-warehouse, which has a ton of great functionality all in one place.

To add additional dependencies we will be editing cqgui_env.yml. Adding dependencies is easy:

– If the dependency is able to be retreived from conda (typically the dependency will suggest installing using conda in the README) then all you must do is add a new line under dependencies.

– If the dependency is only available on pip, then you will need to add pip as a conda dependency (as described above), and then list the pip dependencies as shown in the example below.

#Example cqgui_env.yml file
name: cqgui
channels:
  - CadQuery
  - conda-forge
dependencies:
  - pyqt=5
  - pyqtgraph
  - python=3.10
  - spyder=5
  - path
  - logbook
  - requests
  - cadquery=master
  #Add pip as a conda dep
  - pip
  #List out all your pip deps (here we use github URLs, but package names work as well)
  - pip:
    - git+https://github.com/gumyr/cq_warehouse.git#egg=cq_warehouse
    - git+https://github.com/CadQuery/cadquery-plugins.git#egg=teardrop&subdirectory=plugins/teardrop
    - git+https://github.com/meadiode/cq_gears.git@main

Now it’s time to let conda work its magic, run:
conda env create -f cqgui_env.yml -n cqgui || conda env update -f cqgui_env.yml -n cqgui

The first half of this command attempts to create a new conda environment named cqgui which will contain the dependencies defined in cqgui_env.yml. If this environment already exists, then the first half will return an error, leading to the second half of the command being run (if the first half succeeds, the second half is just skipped). The second half of the command instead updates the existing environment named cqgui to match the dependencies outlined in cqgui_env.yml. This make take a handful of minutes, but once done you’re ready to get things running.

In the root folder of the CQ-Editor source code, run:
conda activate cqgui && python run.py

This command will activate the conda venv we just created and then run the CQ-Editor run.py file in this venv to start up the IDE.

I suggest making a pair of scripts (.bat/.sh) to run these two commands (see here for an example). I am running CQ-Editor in windows so I created a simple CQEditor.bat file, which I then pinned to my Start Menu/Desktop/Taskbar for easy access.

First Steps in CQ-Editor:

You made it! If you’ve gotten here, hopefully you’re now staring at your shiny new CQ-Editor. Take a few moments to explore, and then we’ll jump in to making your first object:

References:

Below are some of the key resources that you should review as you get started working with CadQuery in CQ-Editor:

CadQuery Documentation: visit to get acquainted with the philosophy and approach to designing in CadQuery
CadQuery Examples: I highly recommend you work through this list of examples, as it will help acquaint you with the approach to the most common modeling tasks in CadQuery
CadQuery Cheatsheet: A resource which allows you to see the most common CadQuery functions all in one place! A handy companion to keep by your side on your explorations of CadQuery.
CadQuery API Reference: Use this page as a table of contents for the core CadQuery functions, click each one to get a full overview of their parameters.

Conclusions:

Congrats on your first steps in CadQuery with CQ-Editor. Stay tuned for the next article in our series to learn more about designing real-world models in CadQuery. Happy making!

Intro To CadQuery Series: Overview

In this article we introduce a beginner’s series on CadQuery. You’ll learn a bit more about programatic CAD, the options currently available in the open source space, and get acquainted with CadQuery.

Why Programatic CAD?

Programatic CAD software provides an exciting alternative approach to the traditional 3D design/modeling software most commonly used on the market. By providing a descriptive language for describing the geometry of a part, Programatic CAD solutions give users an unprescedents amount of flexibility. Most notably, this approach permits parametric models, which allow designers to specify variables which dictate the geometry (for example the length/width/height/diameter/thickness, etc) of a feature making them easily editable at a later time. It also allows for components to be reused easily, permits inheritance, enables iterative design, and facilitates change tracking and versioning.

Because designs are easily shared, tweaked, and modified, Programatic CAD designs are extremely compelling for open source projects. One of the most popular Open Source Programatic CAD packages, OpenSCAD, has enabled the open source community and ethos to thrive in the 3D printing space, for example. Thousands of parametric OpenSCAD designs can be found on platforms (like Thingiverse, Printables, etc), and some even have built in “Customizer” tools which allow users to tweak a deisgn’s parameters and download an STL for 3D printing.

Programatic CAD Tools:

There are many options available for newcomers to Programatic CAD, and if you’re like myself this might be a bit overwhelming at first. OpenSCAD may be the first solution that you come across, and while widely used (thus ensuring it a has a good number of tutorials and other community support available) there are lots of things to dislike about this solution. I am far from qualified to explore them all, and online discussion of purported flaws tends to spawn some pretty vigorous debate (see the comments section here for an example). I’m far from an authority on the subject, but for me: OpenSCAD is slow to render (namely as designs increase in complexity, rendering time shoots through the roof), the syntax is clunky and not particularly expressive, it’s missing core features (things as simple as fillets and chamfers), it runs on a CSG rather than BREP modeling system, etc.

The focus of this article isn’t disparaging OpenSCAD, however. Instead, I want to introduce you to CadQuery, a promising new option which I hope can one day overtake OpenSCAD as the superstar of Programatic CAD software.

CadQuery:

So, why should you give CadQuery a go for your next CAD project? I cannot say it any better than the CadQuery creators have themselves:

CadQuery is an intuitive, easy-to-use Python library for building parametric 3D CAD models. It has several goals:
– Build models with scripts that are as close as possible to how you’d describe the object to a human, using a standard, already established programming language
– Create parametric models that can be very easily customized by end users
– Output high quality CAD formats like STEP and AMF in addition to traditional STL

I’m far from a CadQuery guru, having only used the software for a few weeks, however my experience so far has been really enjoyable. The CadQuery syntax provides a much more fluids means of expressing my ideas into parametric designs than any other solution I’ve tried (especially OpenSCAD). That said, there’s definitely a pretty big learning curve. It’s for this reason that I’ve created this series of articles: to help new users get started while avoiding some of the pitfalls I personally encountered on my CadQuery journey. Click below to get started!

TABLE OF CONTENTS:

Quick Tips For Converting to Klipper

I’ve recently converted my Anycubic Kossel Linear Plus 3D printer firmware over from Marlin to Klipper. Along the way I’ve stumbled over some issues that are likely common to a lot of folk making this conversion, regardless of what printer or mainboard they end up using. What follows are a few of the tricks I picked up along the way to help you with your Klipper conversion.

#1: Converting Pinout

Converting from Marlin to Klipper can cause a number of issues, most prominent for me was the difficulty in figuring out which pins correlated to which IDs in Klipper. For instance ATMega2560 pin #60 is called PF6 in Klipper. There seem to be two ways of getting around this.

First you can identify the pin numbers from marlin by searching through the board definition .h files. You can find these by searching, or by navigating to Marlin/src/pins/[board_name].h. In my case I was using the MKS Gen L v2.1, which is based on the classic RAMPS board. The definition for this specific board is found at Marlin\src\pins\ramps\pins_MKS_GEN_L_V21.h. Therein you will find some pin numbers specific to this board as well as an import of the remainder of the pins from the generic RAMPS board at Marlin\src\pins\ramps\pins_RAMPS.h.

These pin numbers can then be converted to Klipper aliases/IDs by looking up the ID referenced by each ar# definition (eg: PD9 or PA23) under the ATMEGA2560 section of this file: https://github.com/Klipper3d/klipper/blob/master/config/sample-aliases.cfg

Another method seems to be using the Klipper config option pin_map: arduino which should let you use the ar# style designation as described above.

A third method is described here, although I have not personally used it:

https://mmone.github.io/klipper/FAQ.html#how-do-i-convert-a-marlin-pin-number-to-a-klipper-pin-name

#2: Setting Up TMC2209 On MKS Gen L 2.1 (and likely others).

I had a lot of trouble getting started when I first attempted to upgrade my stepper drivers from the classic A4988s to the shiny new TMC2209s which boast quieter motors using StealthChop technology, higher heat dissipation allowing for better performance with passive cooling alone, sensorless homing, and more.

I quickly ran into trouble with Klipper not recognizing the drivers via UART and throwing IFCNT errors indicating failed communication. The fix for this is simple but not really detailed anywhere else on the web! For the MKS Gen L and my drivers, you need to configure both the UART Rx as well as Tx pins. These pin assignments can be looked up as described above, and should appear as follows (example from my Anycubic Kossel Config on the MKS Gen L 2.1):

[tmc2209 stepper_a]
 uart_pin: PK1
 tx_pin: PG1
 diag_pin: ^PE5
 run_current: 0.8
 stealthchop_threshold: 999999

[tmc2209 stepper_b]
 uart_pin: PK2
 tx_pin: PF5
 diag_pin: ^PJ1
 run_current: 0.8
 stealthchop_threshold: 999999

[tmc2209 stepper_c]
 uart_pin: PK3
 tx_pin: PL7
 diag_pin: ^PD2
 run_current: 0.8
 stealthchop_threshold: 999999

#3: Reversed Display Cables

A big pitfall which I ran across with the MKS Gen L 2.1 board and the original Anycubic Kossel display is the ribbon cable orientation. Labeled EXP1 and EXP2, these ribbon cables carry the power, input, and display wires to the front-facing display of the printer. Moving from the original Trigorilla board to the MKS Gen L board however, these cables need to be inserted into the new mainboard flipped 180 degrees. There is a plastic tab on the ribbon cables, which seems designed to prevent precisely the flip I am suggesting, however this must be a manufacturing/compatibility issue. What you need to do is cut or shave off this plastic tab from the ribbon cable (I have used an X-acto in the past which is dangerous for the fingers, but found it a ton easier to just cut it off with a flush cutter this most recent upgrade).

You certainly can try it the “wrong way” first to see if it works, it doesn’t appear to damage the screen (at least in my case, but do at your own risk). If the screen doesn’t light up at all (no backlight) then the cables are reversed.

Conclusion

I hope the above tips are helpful to others trying to upgrade their machines, and will try to write up some more when I have some more time. See below for my full configuration files. Until next time, all the best and happy printing!

Example Configurations:

Klipper w/ MKS Gen L 2.1 (w/ TMC2209 drivers):
[include mainsail.cfg]
[include macros.cfg]

[stepper_a]
step_pin: PF0
dir_pin: PF1
enable_pin: !PD7
microsteps: 16
rotation_distance: 40
#endstop_pin: ^PE5 #X-Min, PE4:X-Max
endstop_pin: ^PE4
homing_speed: 60

[tmc2209 stepper_a]
uart_pin: PK1
tx_pin: PG1
#diag_pin: ^PE5
run_current: 0.8
stealthchop_threshold: 999999

[stepper_b]
step_pin: PF6
dir_pin: PF7
enable_pin: !PF2
microsteps: 16
rotation_distance: 40
#endstop_pin: ^PJ1  #Y-Min, PJ0:Y-Max
endstop_pin: ^PJ0  #Y-Min, PJ0:Y-Max

[tmc2209 stepper_b]
uart_pin: PK2
tx_pin: PF5
#diag_pin: ^PJ1
run_current: 0.8
stealthchop_threshold: 999999

[stepper_c]
step_pin: PL3
dir_pin: PL1
enable_pin: !PK0
microsteps: 16
rotation_distance: 40
#endstop_pin: ^PD3  #Z-Min, PD2:Z-Max
endstop_pin: ^PD2

[tmc2209 stepper_c]
uart_pin: PK3
tx_pin: PL7
#diag_pin: ^PD2
run_current: 0.8
stealthchop_threshold: 999999

[extruder]
step_pin: PA4
dir_pin: PA6
enable_pin: !PA2
microsteps: 16
#rotation_distance: 33.333
#rotation_distance: 11.1
rotation_distance: 8
nozzle_diameter: 0.5
filament_diameter: 1.750
heater_pin: PB4
sensor_type: EPCOS 100K B57560G104F
sensor_pin: PK5
control: pid
pid_Kp: 25.349
pid_Ki: 1.216
pid_Kd: 132.130
min_extrude_temp: 150
min_temp: 0
max_temp: 275

[tmc2209 extruder]
uart_pin: PK4
tx_pin: PL5
#diag_pin: ^PD2
run_current: 0.8

[heater_bed]
heater_pin: PH5
sensor_type: EPCOS 100K B57560G104F
sensor_pin: PK6
control: pid
pid_kp: 73.517
pid_ki: 1.132
pid_kd: 1193.728
min_temp: 0
max_temp: 130

[fan]
pin: PH6
kick_start_time: 0.200

#[heater_fan extruder_cooler_fan]
#pin: PH6

# if you want to use your probe for DELTA_CALIBRATE you will need that
[probe]
pin: ^PD3
#z_offset: 16.4
samples: 3

[mcu]
serial: /dev/serial/by-id/usb-1a86_USB_Serial-if00-port0

[printer]
kinematics: delta
max_velocity: 250
max_accel: 2500
max_z_velocity: 200
#delta_radius: 110
minimum_z_position: -5

[idle_timeout]
timeout: 360

[delta_calibrate]
radius: 105
horizontal_move_z: 25
speed: 75

[bed_mesh]
speed: 100
horizontal_move_z: 25
mesh_radius: 100
mesh_origin: 0,0
round_probe_count: 5
algorithm: bicubic
mesh_pps: 2, 2

# "RepRapDiscount 2004 Smart Controller" type displays
[display]
lcd_type: hd44780
rs_pin: PH1
e_pin: PH0
d4_pin: PA1
d5_pin: PA3
d6_pin: PA5
d7_pin: PA7
encoder_pins: ^PC6, ^PC4
click_pin: ^!PC2
kill_pin: ^!PG0

[filament_switch_sensor runout_sensor]
#pause_on_runout: True
runout_gcode: PAUSE
#insert_gcode: RESUME
event_delay: 3.0
pause_delay: 0.5
switch_pin: PE3  
Klipper w/ Original Tri-Gorilla Board:
[include mainsail.cfg]
[include macros.cfg]

[stepper_a]
step_pin: PF0
dir_pin: !PF1
enable_pin: !PD7
microsteps: 16
rotation_distance: 40
endstop_pin: ^PE4
homing_speed: 60
# The next parameter needs to be adjusted for
# your printer. You may want to start with 280
# and meassure the distance from nozzle to bed.
# This value then needs to be added.
#position_endstop: 280
#arm_length: 269.0

[stepper_b]
step_pin: PF6
dir_pin: !PF7
enable_pin: !PF2
microsteps: 16
rotation_distance: 40
endstop_pin: ^PJ0

[stepper_c]
step_pin: PL3
dir_pin: !PL1
enable_pin: !PK0
microsteps: 16
rotation_distance: 40
endstop_pin: ^PD2

[extruder]
step_pin: PA4
dir_pin: !PA6
enable_pin: !PA2
microsteps: 16
#rotation_distance: 33.333
#rotation_distance: 11.1
rotation_distance: 8
nozzle_diameter: 0.5
filament_diameter: 1.750
heater_pin: PB4
sensor_type: EPCOS 100K B57560G104F
sensor_pin: PK5
control: pid
pid_Kp: 25.349
pid_Ki: 1.216
pid_Kd: 132.130
min_extrude_temp: 150
min_temp: 0
max_temp: 275

[heater_bed]
heater_pin: PH5
sensor_type: EPCOS 100K B57560G104F
sensor_pin: PK6
control: pid
pid_kp: 73.517
pid_ki: 1.132
pid_kd: 1193.728
min_temp: 0
max_temp: 130

[fan]
pin: PH6
kick_start_time: 0.200

[heater_fan extruder_cooler_fan]
pin: PL5

# if you want to use your probe for DELTA_CALIBRATE you will need that
[probe]
pin: ^PD3
#z_offset: 16.4
samples: 3

[mcu]
serial: /dev/serial/by-id/usb-Silicon_Labs_CP2102_USB_to_UART_Bridge_Controller_0001-if00-port0

[printer]
kinematics: delta
max_velocity: 250
max_accel: 2500
max_z_velocity: 200
#delta_radius: 110
minimum_z_position: -5

[idle_timeout]
timeout: 360

[delta_calibrate]
radius: 105
horizontal_move_z: 25
speed: 75

[bed_mesh]
speed: 100
horizontal_move_z: 25
mesh_radius: 100
mesh_origin: 0,0
round_probe_count: 5
algorithm: bicubic
mesh_pps: 2, 2

# "RepRapDiscount 2004 Smart Controller" type displays
[display]
lcd_type: hd44780
rs_pin: PH1
e_pin: PH0
d4_pin: PA1
d5_pin: PA3
d6_pin: PA5
d7_pin: PA7
encoder_pins: ^PC6, ^PC4
click_pin: ^!PC2
kill_pin: ^!PG0

[filament_switch_sensor runout_sensor]
#pause_on_runout: True
runout_gcode: PAUSE
#insert_gcode: RESUME
event_delay: 3.0
pause_delay: 0.5
switch_pin: PE3  

Setting up Home Assistant Supervised w/ WiFi on DietPi 64 bit running on Raspberry Pi 4

Start by downloading DietPi. First navigate to the website, navigate to the download section, and select the 64 bit version for Raspberry Pi.

Burn it to your micro SD card with your software of choice (I use Balena etcher on Windows). Once burned, unplug the SD card and re-insert it into your computer so you can edit your config and setup your Wifi. Use the following steps from the DietPi website:

  1. Open the file named dietpi.txt. Find AUTO_SETUP_NET_WIFI_ENABLED and set to value 1.
  2. Open the file dietpi-wifi.txt and set aWIFI_SSID[0] to the name of your WiFi network.
  3. In the same file dietpi-wifi.txt, set aWIFI_KEY[0] to the password of your WiFi network.
  4. Save and close the files

Once completed you can eject your SD, insert it into your pi and boot up! SSH into your Pi (default user: root | password: dietpi) and complete the setup. Go ahead and install Docker using dietpi-software. Now you’ll install a few dependencies:

apt install -y software-properties-common apparmor-utils apt-transport-https ca-certificates curl dbus jq network-manager

For the next step you’ll need to have your Pi plugged into either ethernet or a screen w/ keyboard. Because Home Assistant requires network-manager to function, while DietPi uses ifupdown, you’re about to run into some issues. In order to get Wifi working you’ll want to go and edit: /etc/network/interfaces. Use nano or your editor of choice and remove all of the lines associated with the WiFi configuration. Now you’re going to install Home Assistant:

cd /tmp/
curl -Lo installer.sh https://raw.githubusercontent.com/home-assistant/supervised-installer/master/installer.sh
chmod +x installer.sh
bash installer.sh --machine raspberrypi4-64

Running the above commands will get the automated installer started, and you’ll quickly be presented with a prompt to overwrite your network manager settings. NOTE: If you’re on Wifi, and say either Yes or No at this step you will be disconnected!! Select Y, and the installer will proceed to install home assistant. Now, to reconnect to WiFi, the easiest approach will be to run the network-manager GUI via: nmtui. Run the command, select “Activate a connection” and enter in your WiFi details. Now you should be all set, enjoy your new Home Assistant setup!

Hotkeyboard – Part 1

I spend a large proportion of my day at a keyboard, both as a computer nerd (writing code, designing hardware, etc) and as an intern in internal medicine. I’ve come to appreciate a good keyboard when I use one, and I have definitely gotten some keyboard envy when I spy some of the fancier models bounding around the internet.

It seems like a sort of maker rite-of-passage to design and build your own keyboard, so inspired by some of the other builds I’ve seen on places like Hackaday and Thingiverse, I decided it was finally time to tackle my own.

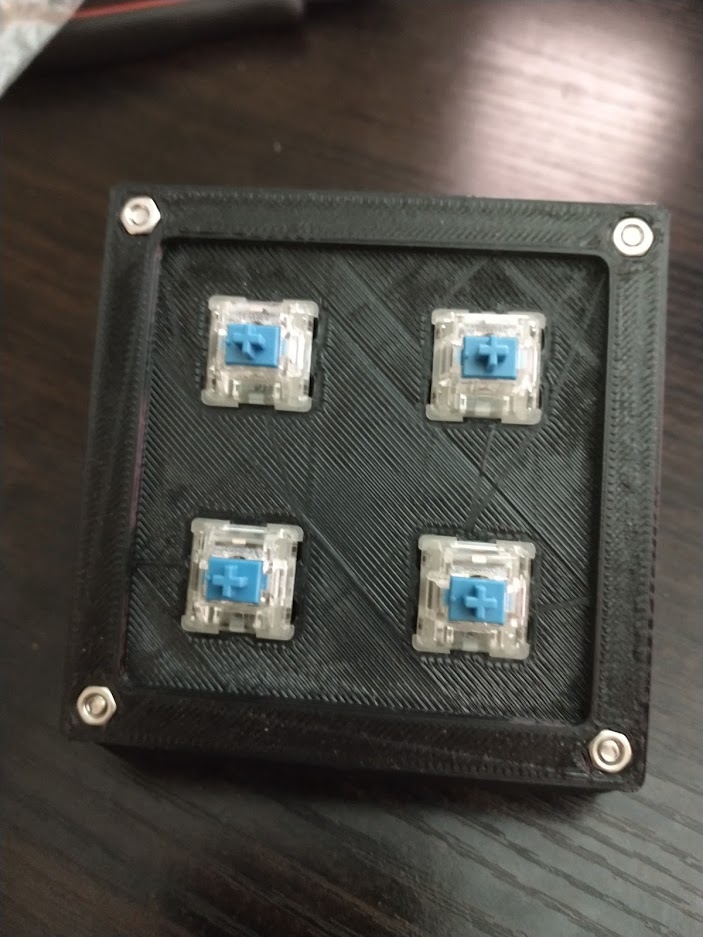
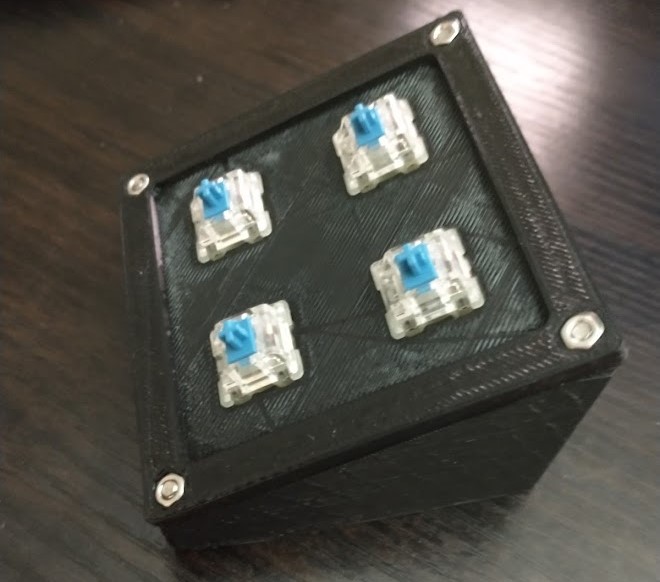
Behold, my first attempt! Using OpenSCAD, I wrote the code to create a customizable hot-key keyboard (ie: not meant to cover the entire alphabet, more for quickly running a commonly used command or macro), which uses the common Cherry-MX switches and all of their click-y goodness. You can enter any arbitrary number of keys per row/column and it’ll spit out an STL to be used on your fav 3d printer. Wiring is easy, and using a Raspberry Pico as the brains makes it simple to start writing the script required to execute your hotkey commands/macros (more on that in another post). Now all I have to do is finish writing the script, and design some nice key-caps to match each key’s function. That and more coming up soon… to be continued!

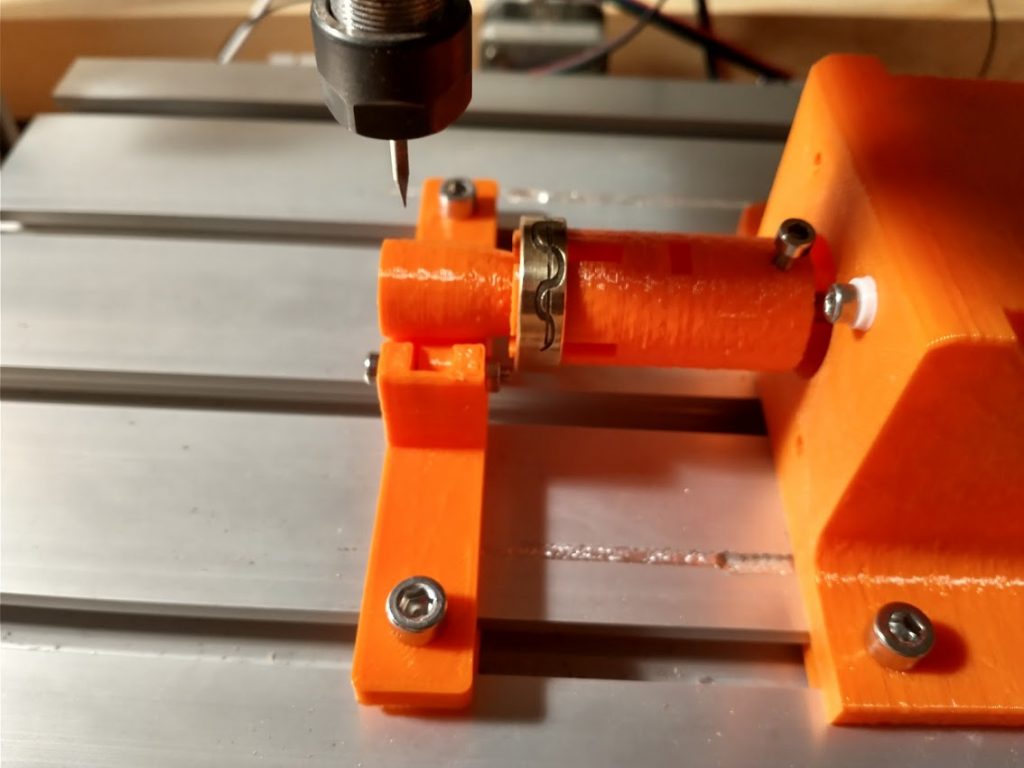
Designing a 4th Axis for Engraving Rings on the CNC 2418/3018

Bill of Materials:

  • NEMA 17 Stepper Motor
  • 6x M5-16mm screws for securing to CNC build plate
  • 6x M5 nuts
  • 1x M3-35mm screw for driving wedge into mandrel
  • 1x M3-12mm screw for securing mandrel to stepper motor shaft
  • 4x M3-16mm screws for securing stepper motor to mount
  • 2x M3-20mm screw for axles on steady rest

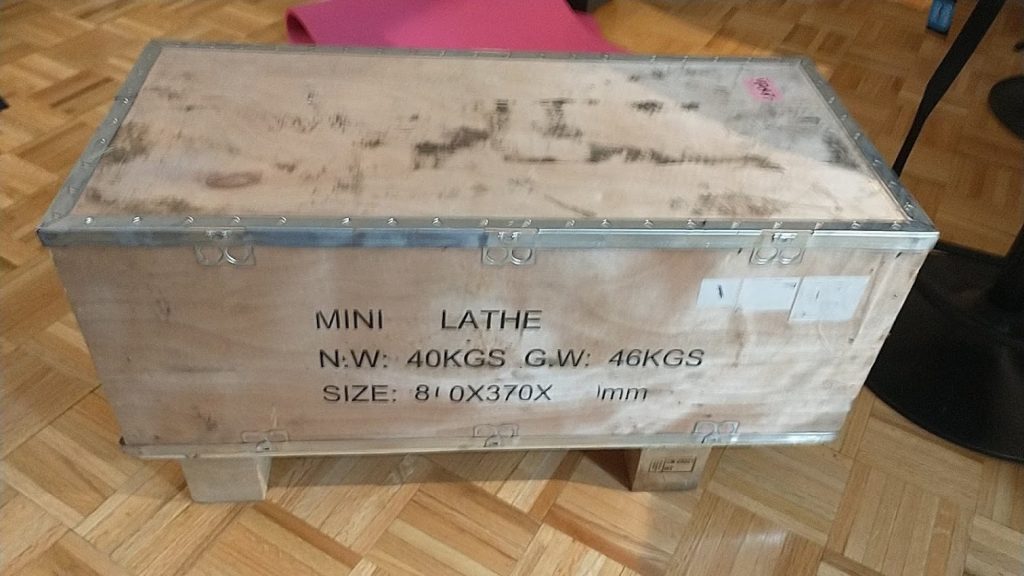
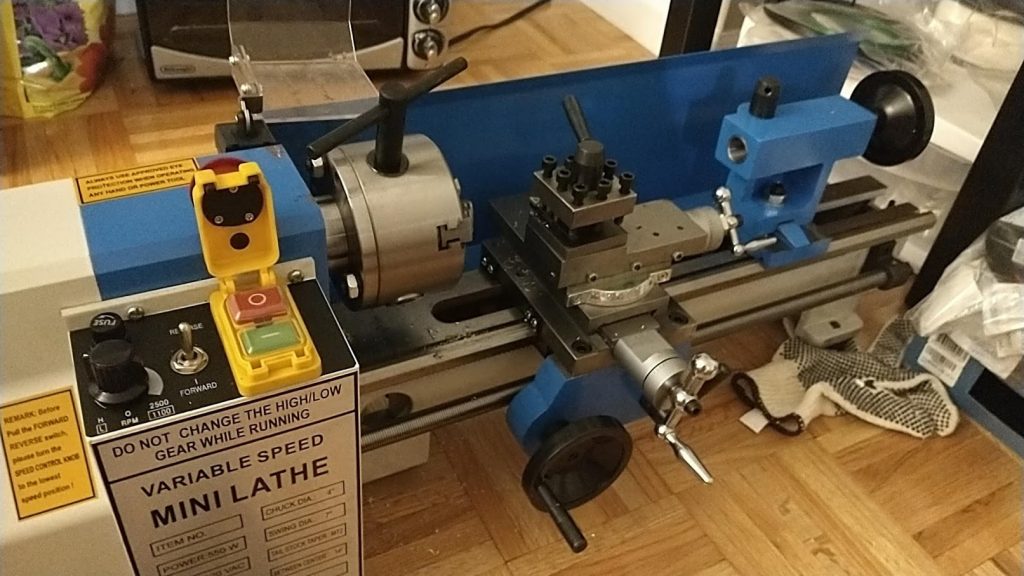
It wasn’t too long ago that I impulse bought myself a mini lathe, inspired by the likes of This Old Tony among other youtube makers. I’ve relied on a scattered hodgepoge of information across the internet in order to get started actually using the thing. Safety came first, but after learning how to spin a chunk of metal at high speed and do so in a way that didn’t make me fear for my life, I turned toward learning how to actually incorporate this awesome new tool into my projects.

I came across the stellar introductory metal lathe tutorials by Blondihacks, and I am incredibly appreciative of Quinn’s ability to present the complex information surrounding proper lathe usage in such a straightforward and thoughtful manner! I would highly recommend checking them out if you’re just getting started with your first metal lathe!

I finally started gaining my footing, and by the time I reached “Metal Lathe Tutorial 16: Your First Project!” I was excited to put my newfound knowledge to good use. While there are many good options for a first project, Blondihacks kept it simple: we would make a ring (in other words, a simple bushing in disguise). I loved the idea, particularly as I had gotten my hands on some beautiful, shiny brass to start turning, I envisioned it would make a lovely ornamental piece.

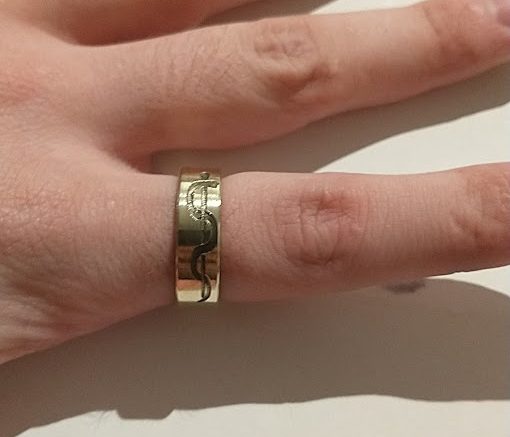
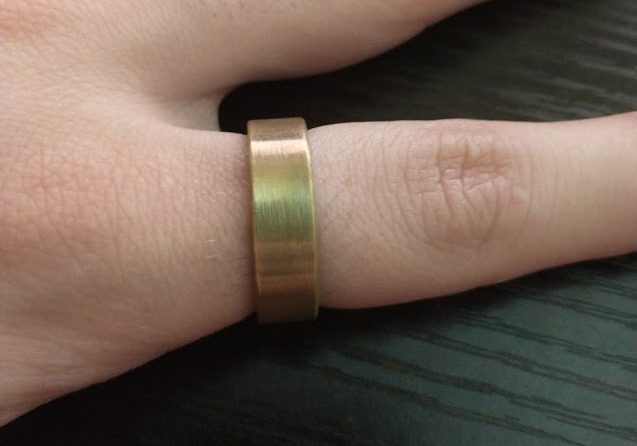
I took the dimensions of my finger, drew out my schematic and organized my order of operations before setting out: facing, turning, center drilling, drilling, parting, filing, deburring, and finally polishing! Before I knew it, I’d turned a rod of solid brass into a shiny ring which slid perfectly onto my finger.

This was very satisfying, and I liked the look of the finished product, but I wanted to take this simple first project to the next level. I wanted to add some decorative elements, to up the wow factor. I also wanted to make another ring as a gift for my girlfriend, and I wanted to give it a bit more of my personal touch, add more of my craftsmanship and love to the final piece.

Design:

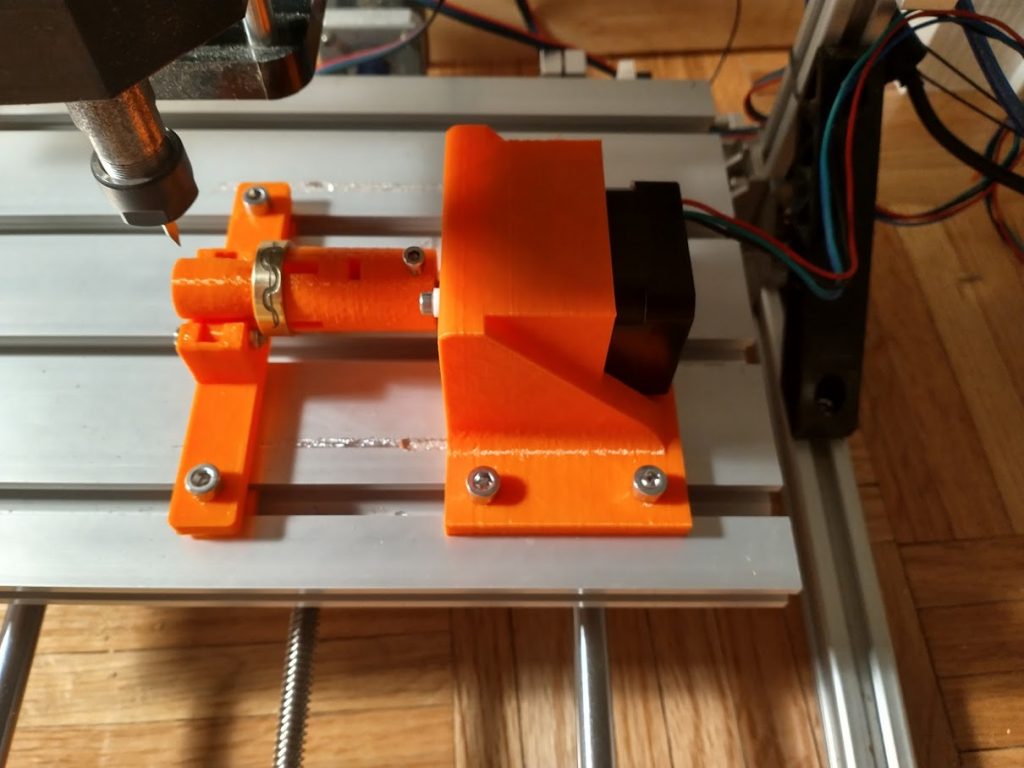
With this in mind, I started searching for solutions which would allow me to use my CNC machine to etchy whatever kind of ornate pattern I desired into the surface of the ring. I envisioned a simple fourth axis using a stepper motor to turn some sort of mandrel which would hold the ring in place during carving. I turned to thingiverse, thinking surely someone else had designed one already. Much to my surpise no such design existed! Determined to make it happen, I booted up Freecad and started designing my own.

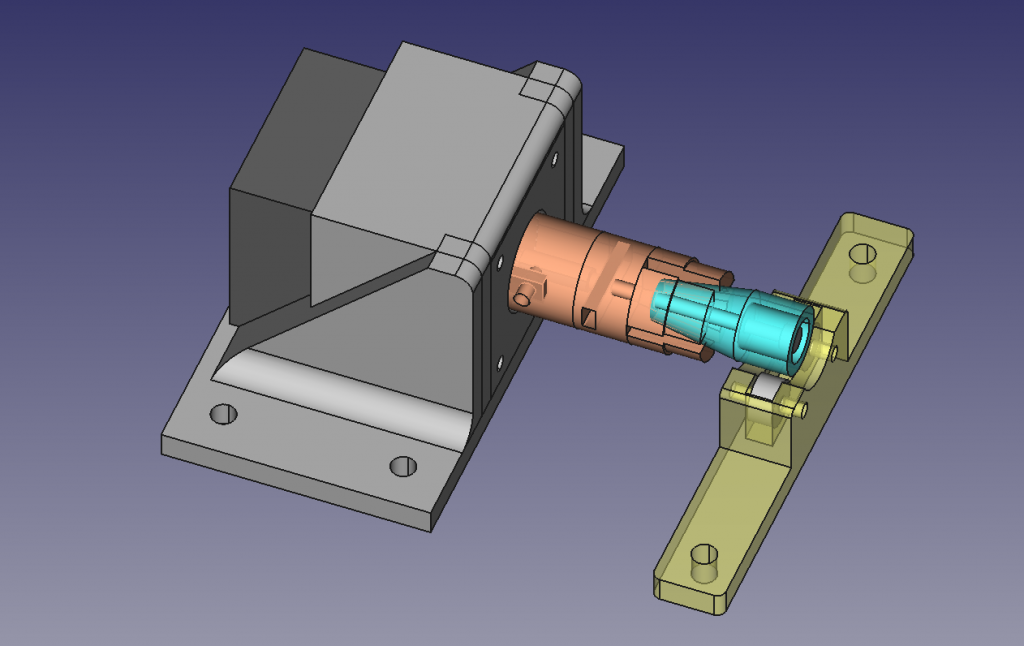
Dark Grey = Stepper | Light Grey = Stepper Mount | Orange = Mandrel | Blue = Wedge | Yellow = Steady Rest

Above you can see the latest version of the FreeCAD model as of the time I am writing this post (v3, although some work still remains to perfect the design). Both the original design files and the STLs can be found on Thingiverse:

https://www.thingiverse.com/thing:4778215

Engraving:

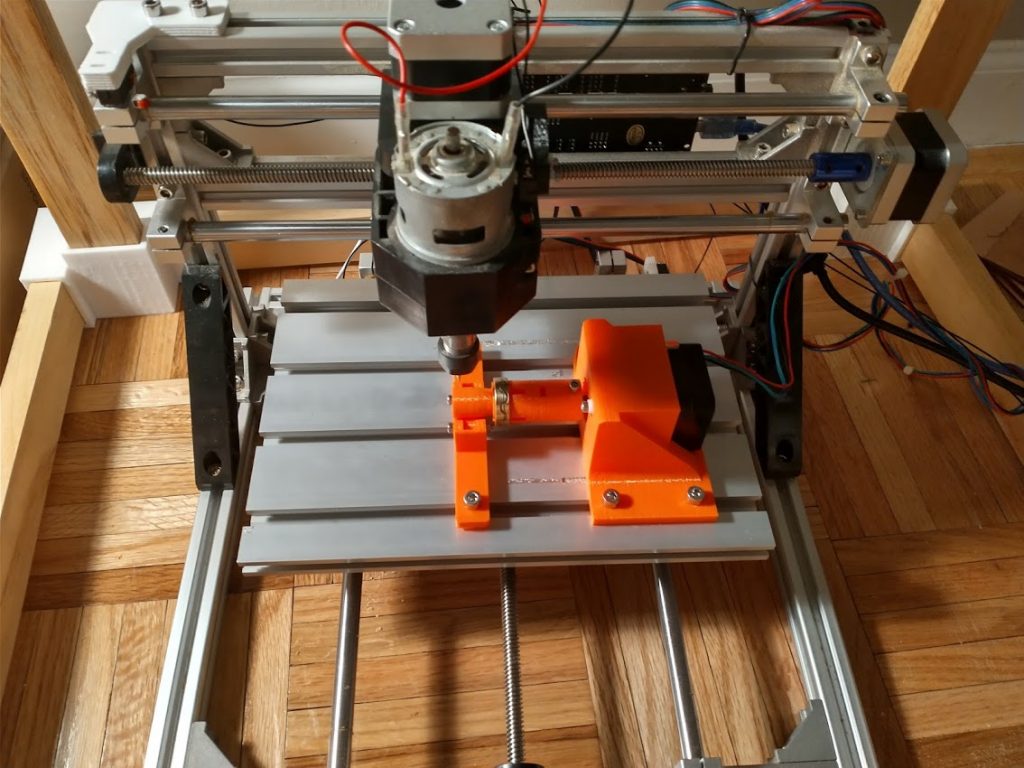
I want to share the steps that I took in order to actually put the above design into action, with the hope that one day it might help someone else looking to do something similar.

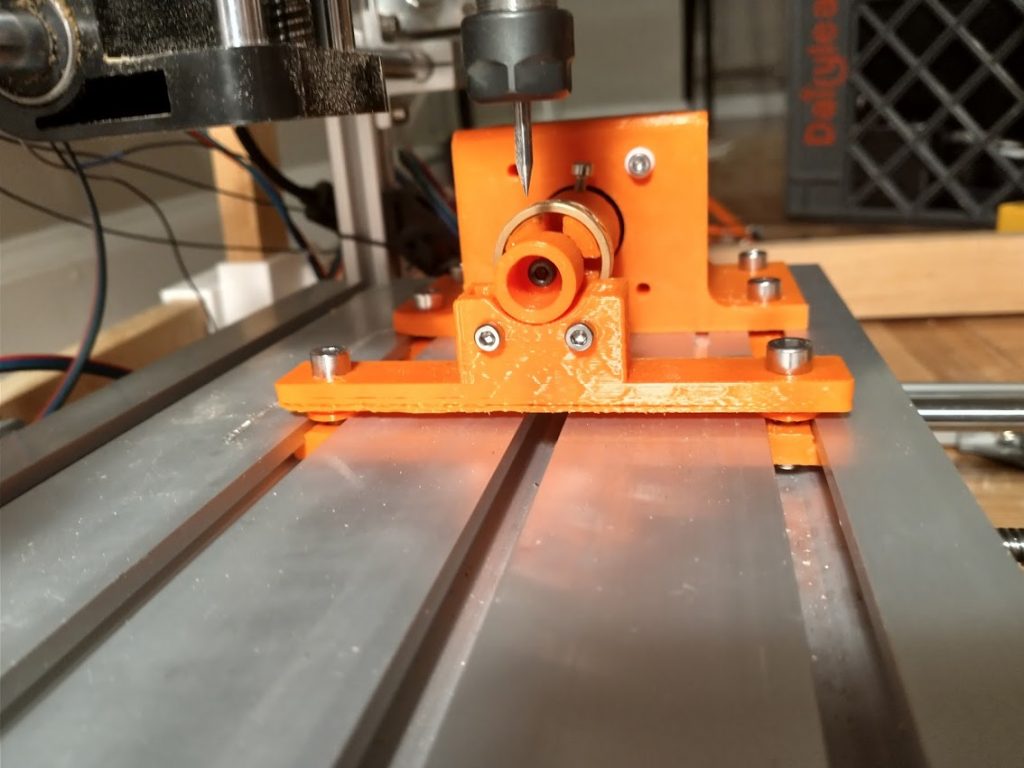
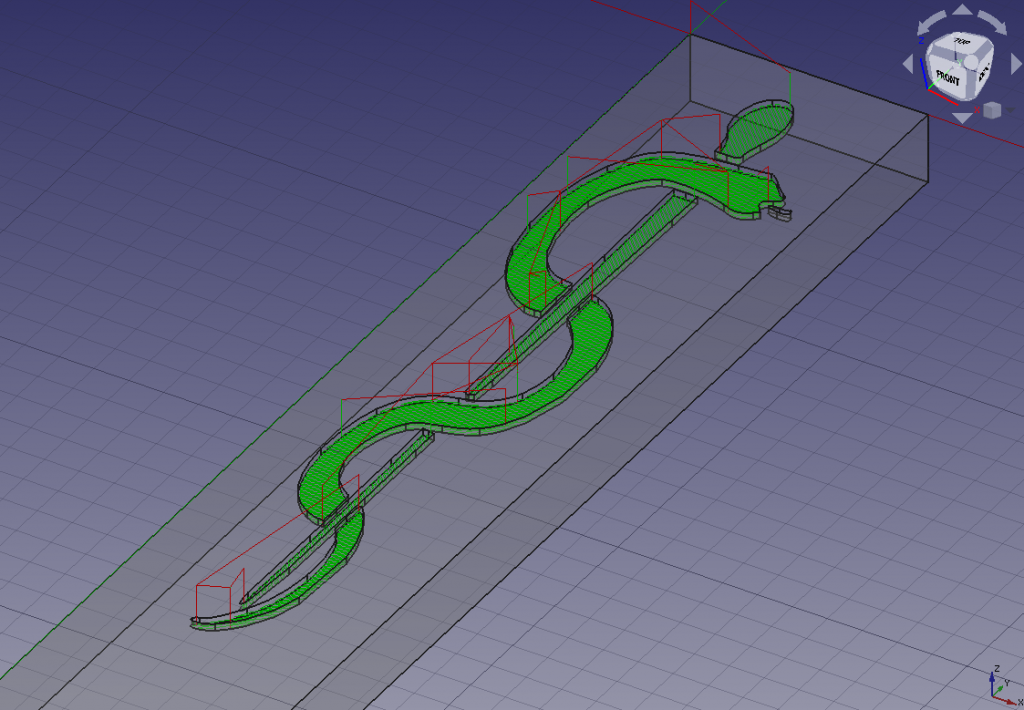
I started by finding an SVG of my design. For my first run, I used the staff of asclepius, a symbol of medicine and physicians. I pulled this into FreeCAD using the “Draft” workbench. I then convert to a sketch before switching to the part design workbench to fit it into my body of choice. See the video below for a quick rundown on my methodology.

Once I’ve got my model all setup I head over to the path workbench and create my toolpath. In the current version of freecad the engraver tool does not seem to work for pocketing so I create an endmill tool with a diameter of 0.1mm, which approximates the diameter of the tip of my V-engraver bit. I create a pocket operation with a 0.2mm final depth and 0.1mm stepdown (this is likely very conservative, but better safe than sorry). I use a 1mm/sec feedrate and set my spindle to max RPM.

The final step before starting your operation on the CNC mill is VERY IMPORTANT! With this new rotary 4th axis, you must tell your CNC machine how many steps it takes to move 1mm on the surface of your ring. In my case, I am using GRBL to run my CNC mill; additionally my control board does not have a free stepper port to control the 4th axis so I swapped out the y-axis stepper for the 4th axis stepper. Given I am using the Y-axis I went ahead and changed the value of $101= 38, which tells the control board that there are 38 steps required to travel 1 mm on this axis. (note, always a good idea to write down your default value, so you can reset back to it once your done using the 4th axis). I arrived at the number 38 using some simple math. My stepper drivers are set to 1/8th stepping, thus there are 360 * 8 steps per full revolution. I know that the outer circumference of my ring is equal to pi * diamter (in my case pi * 24 ~= 75). Thus I simply calculate (360 * 8) / (pi * 24) ~= 38.

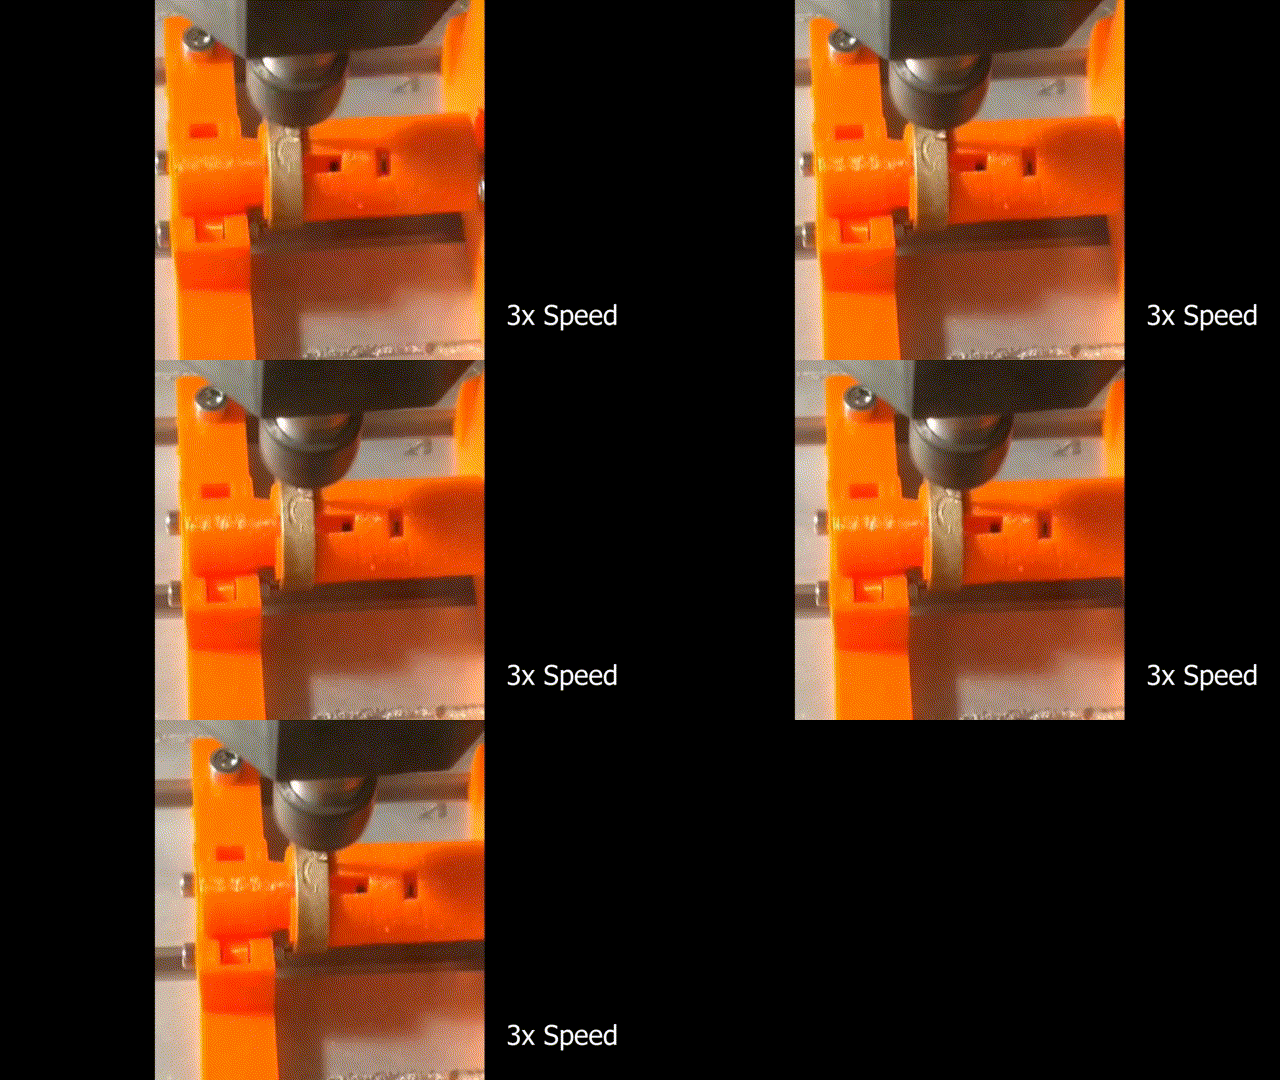
With that final step, we were off to the races. It was smooth sailing from there, with one exception. It seems that there is some imperfection in the leveling of my setup (something I tried to avoid with the steady rest, with mixed results. Thus the bottom half of my design did not engrave as deeply as the top half. The fix was easy in this case, I simply re-engraved this section of the design after dropping my starting Z by 0.1mm. On my next run I hope to avoid this issue altogether by using my CNC’s Z-probe function to map out the height of the ring surface (it’s conductive so it should be fairly straightforward) prior to engraving. I’ll be sure share the results in my next blog post. Until then, stay happy and healthy, and may you have success in all your DIY endeavors!

COVID-19 Mask Search 2.0

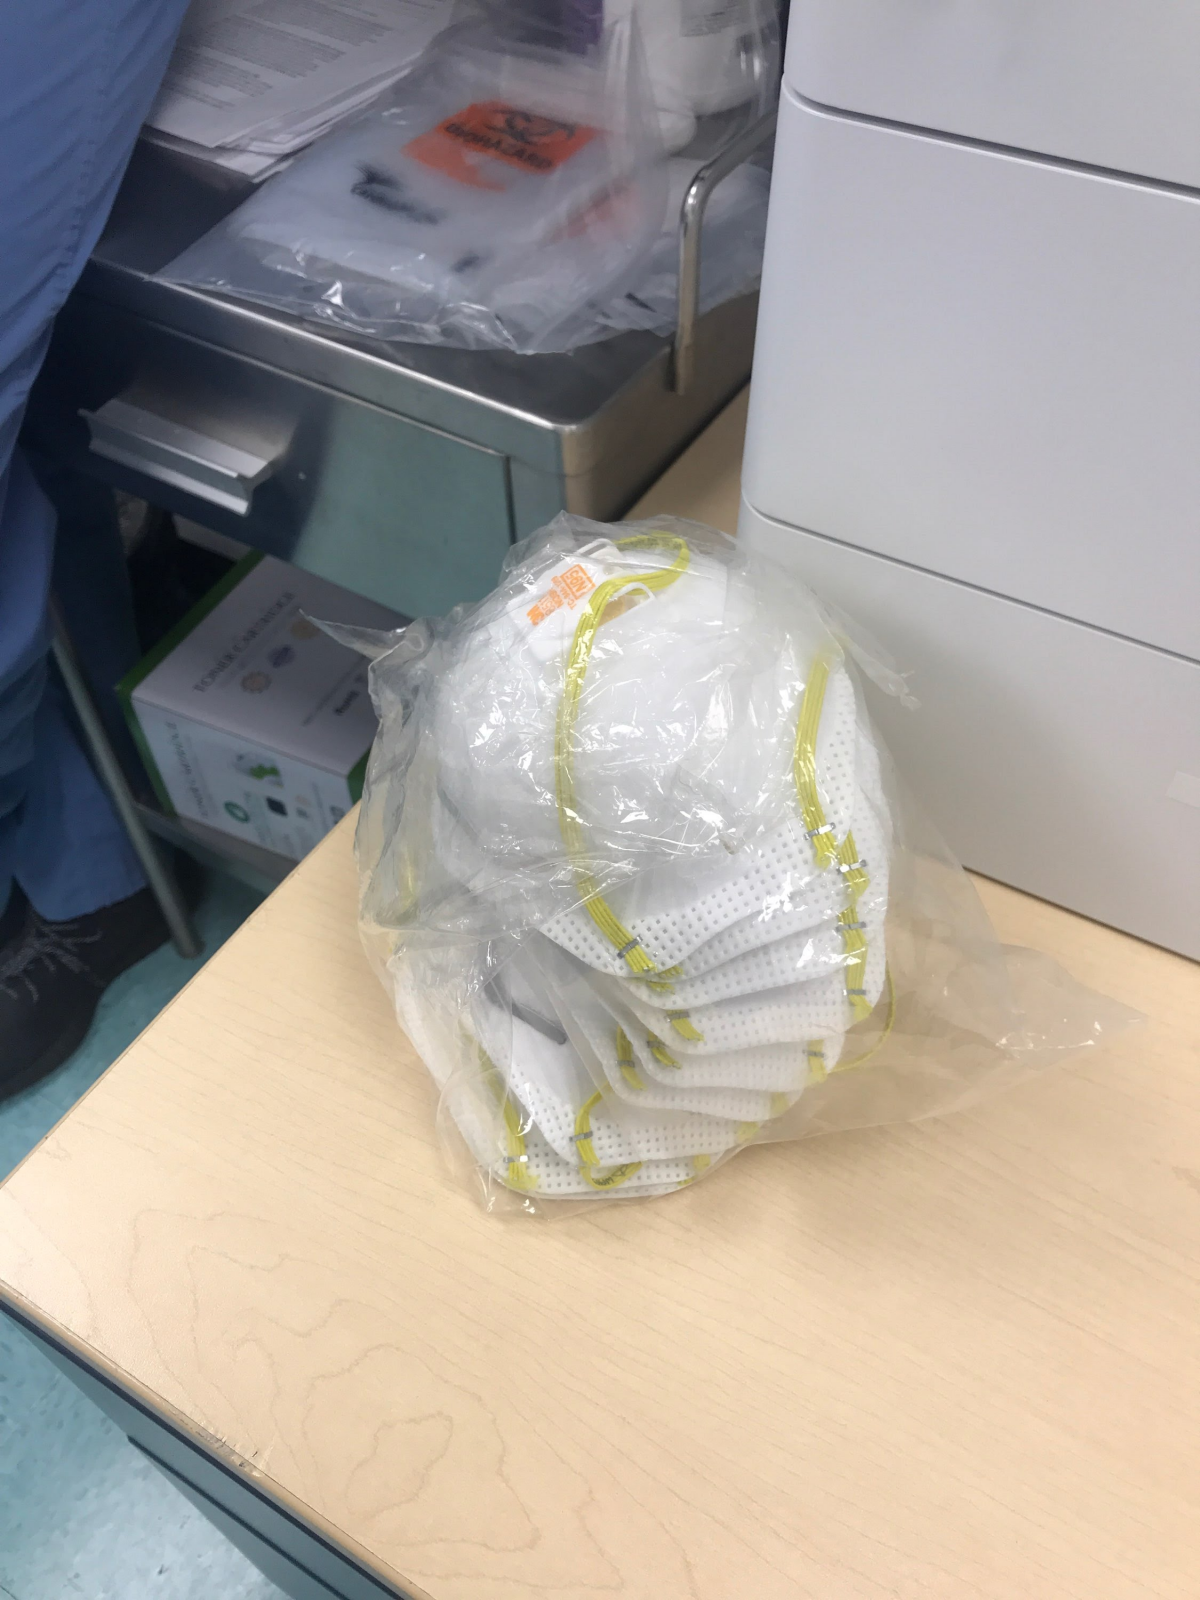
Around two weeks ago, I posted about a bit of software I wrote in Python. The goal of this project was to quickly create spreadsheets of businesses in a given area, such that they could be imported into a shared Google Sheet and used in order to organize volunteers at my medical school in their efforts to call businesses and ask for donations of personal protective equipmment (PPE; namely N95s/masks) for our frontline healthcare workers. Word quickly spread and I was soon flooded with requests from students at other schools around the country to help them with fetching their own PPE data.

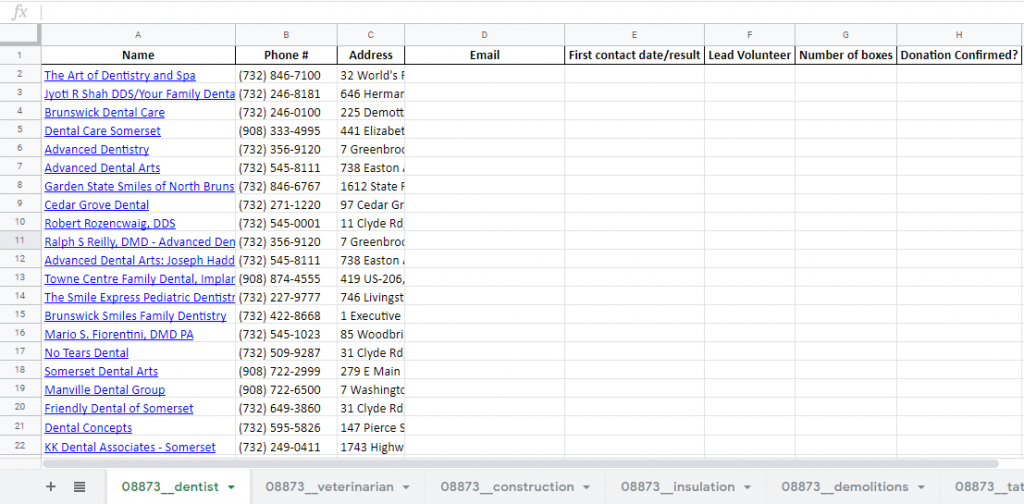
I wanted to publish this update both to share the good this little bit of code has helped make happen (see the map above), but more importantly to share the latest version. This new release of the software contains essential updates: not only is it cleaner and easier to understand (I hope), but new functionality has been added in to further automate the fetches of data. Now, instead of generating one CSV file per locale+industry, the software accepts a list of industries/business types and a locale and then searches for each industry in the given locale, ultimately generating an excel spreadsheet with multiple pages: one for each industry with hundres of rows of businesses and their info such as name, phone #, address, and some other added metadata for volunteers to use for organization. After that, all you need to do is upload this excel spreadsheet to Google sheets and convert it to the Google Sheets format (File -> Save as Google Sheet). Share it with a group of volunteers and let the phone calls and PPE donations start building up. This work can really make a difference for those on the frontline desperate for the PPE they need to protect themselves from infection!

Example of a spreadsheet of business data uploaded to Google Sheets.

Yelp Mask Search: Collect Business Contact Info For COVID-19 PPE Donations

See the latest updates to this project in part 2!

With the outbreak of COVID-19 in NYC, our healthcare system has demonstrated that it is poorly equipped to respond to the needs of its clinicians and other frontline healthcare workers. Most obvious is the lack of effective personal protective equipment (PPE; namely N95 respirators and other masks) which our doctors, nurses, respiratory therapists, and others need in order to protect themselves against infection with the virus. It’s glaringly obvious that if you fail to protect your healthcare workers from falling ill, your system is going to fail — and fast too. Nonetheless, we are barely at the outset of the outbreak and our hospitals are already strictly rationing PPE, causing deeply concerning comprimises in patient and provider safety.

Residents from multiple NYC hospitals reach out to our volunteers to acquire proper PPE.

The problem has gotten so bad that residents and medical students have begun scouring the community for businesses (closing down by law) with extra respirators that they are willing to donate. I was brought on to a medical student team that was calling construction businesses, nail salons, dry cleaners, hardware stores, and tattoo parlors. The volunteers had been manually entering businesses into a massive spreadsheet: organizing the info on what business had been or needed to be called, who had donations to give, and more.

Example PPE donation spreadsheet. Business info (veterinarians, construction, painters, dry cleaners, etc) retrieved from online searches manually.

I was asked to write some code to scrape the web for a list of businesses and their contact info. I went to the Yelp API, and got to work. What resulted was a simple python notebook that I am now hoping to share with voluteers at other hospitals or med schools. The code simply takes a Yelp API key, location, and search terms and generates a CSV spreadsheet of the first 1000 businesses to match the search along with their phone numbers, addresses, and Yelp pages.

You can get started using this simple data scraper by opening the Python notebook below for free using Google Colab (look for button at the top of the code). Once open, simply change the settings for your location, search terms, and API key and you can start generating your own lists of businesses to call for donations! Our group has had success with copy/pasting each industry into its own page in a Google spreadsheet. With this system, multiple volunteers can collaborate and work on calling businesses in parallel.